Friday, August 16, 2024

Fix Always-on Defrost + Floor for Ford/Lincoln/Mercury EATC Climate Control

So there we were: driving from Portland to San Diego, car full of apartment supplies and heading into the desert south of Eugene, OR on a 95F/35C day. When we hit the first hill, the AC makes a sound and switches from Max to Defrost and looses all efficiency. Ugh.

I had a hell of a time getting the air conditioning on my 2000s Mercury Grand Marquis to blow anything but Defrost/Floor. It started with family smelling exhaust when it was on Max AC/Recirculate. Then it would switch to Defrost when going uphill. Finally, it stopped sending air through anything by the top vent/floor.  Turns out the vacuum-actuated doors run through the notoriously leaky EATC HVAC Control Head. The troubleshooting advice below should apply equally to any vacuum system Ford/Lincoln/Mercury AC units.

Initial Troubleshooting - O-Rings

If you're here, you have probably seen the archived MercuryMarauder.net thread with tons of advice, pictures, and fixes to help you get started. The best fix to start with is to swap out the o-rings inside the solenoids. The fix is a few dollars (007 O-Rings from any Ace should work, or get the silicone ones from eBay from sellers that have them specifically labeled for this fix). It can be done in an hour with the proper tools, and there are a ton of YouTube videos detailing the fix.

007 O Rings at Ace hardware


Next Step - Leaking Valve Body

Sometimes, the o-ring fix doesn't work. Farther down the thread, fastblackmerc details how to fix a leaky valve body -- the part that connects the hoses to the solenoids:

  1. Disassemble the EATC Head. Take off the solenoids completely so it is just black plastic.
  2. Plug the solenoid tubes with 5/8" vac caps (made mine out of kinked tubes)
  3. Plug the vac hose tubes with 1/8" vac caps (connected these to each other, see below)
  4. Check to see if the body is holding pressure: Hook a length of spare tube up to one of the tubes and blow with your mouth. If it's not holding pressure, you will hear a hissing from the tubes or body.
  5. Check where the leaks are coming from: Submerse the entire valve body in water and blow again. You'll see bubbles rising from the micro-cracks letting out the air.
  6. Dry off the valve body and cover/fill up cracks with 2-part epoxy. You can also use the same tube you used to blow in air to subject the valve body to a vacuum and draw the epoxy into the cracks. Careful! Don't get too aggressive with this or you might plug the pathways for vacuum.
  7. Wait for the epoxy to cure and repeat the check for cracks/fill steps until the valve body is no longer leaking.

For me, I took his advice and it still didn't work. I had leaks elsewhere. But it might work for you.

Valve Body with all it's holes plugged

Desperation Move - Bypass Valve Body

If the fixes to the valve body are still not working, you might needs to bypass the head completely. This can be done as easily as hard-wiring 1/8" vacuum tubing to the two mixer doors that control air flow. Or you can follow a simple extra step to ensure you can restore Defrost as needed.

I followed Victor's video about the bypass. He gets under the dash (two plastic panel shield retainers hold it to a metal bracket) and is able to access the vacuum coupling behind the EATC Head.  1/8 hose and T connectors from AutoZone helped me get the bypass and Recirculate working just like him.

To take it a step further, I bought a 1/4 sprinkler valve from Lowes and patched it in with an additional T. Now I can turn the valve to open on cold mornings, let the vacuum out, and get Defrost/Floor when I want. I left the hose extra long and ran it up into the glove box. Easy access but still hidden.

Bodge under the dash for Recirculate

Valve that an be opened at will for turning on Defrost/Floor

Side Step - Check that the Door Actuators Still Work

If this isn't your first crack at the fix, you might want to make sure the door actuators are actually working. If the issue started occurring for you gradually, and all mix doors won’t respond, this is unlikely to be your problem. However, it can help to rule out all possible causes if it is driving you crazy.

To do this, you will need to access the vacuum lines (detailed above) and a length of vacuum hose and some fittings to get a good seal. You can either create your own vacuum with a hand-pump of the type used to bleed brakes, or pipe the existing vacuum main line from one line to each outlet and listen for the doors as they actuate beneath the dash. An extreme solution is pictured below. Using sprinkler fittings, I bodged together a 4-way plug to make sure I was getting Recirculate mode activated.

The hand pump vacuum is holding pressure. The EATC is probably at fault.

Tuesday, July 16, 2024

Troubleshooting SNS to S3 Via Kinesis Firehose

 Here are some troubleshooting tips for ensuring AWS SNS messages get to S3.

  • First create your Firehose using Direct PUT. Select your S3 bucket and configure prefixes and other options so you can identify your records within the bucket.
  • Test your firehose can get messages into S3. There is a button right on the AWS console to do this. For default prefixes, you’ll see in your bucket keys for /YYYY/MM/DD/HH with new files bundling several messages by timestamp. Note: this may take up to five minutes to show up if you didn’t play with the buffer settings!
  • If your messages aren’t arriving, check that the bucket can receive messages from Firehose. You might also take toss time to configure the lifetime of objects in the bucket. If they’re logs or things with a defined useful lifetime, you might want to set a retention period to clear them out, move them to Glacier, etc.
  • Once you’ve got messages flowing, you should be able to create your SNS subscription to your Firehose now. You’ll need an IAM Role with Trust to SNS and Firehose access. The built-in policy for this is great for testing purposes, but pare access down using a custom policy before going live. Once again, you might have to wait up to five minutes if you didn’t play with the buffer amount to get them to transfer immediately.
  • If logs still aren’t arriving, check your SNS message log failures. You can do this by editing the Topic and configuring a role that has CloudWatch access (for writing to CloudWatch logs). Then look for the sns/region/account/Failure key in CW and check for errors in the logging json.
  • As an example, I selected a Kinesis Data Stream instead of Direct PUT when setting up the firehose. My SNS messages failed to send, but I could push things to S3 using the test button in the Kinesis console. My SNS failures showed up in the CW logs as “400 This operation is not permitted on KinesisStreamAsSource delivery stream type”. This might not be your exact error, but the failure logs will illuminate other errors too.
I’m just getting started with Firehouse. But these troubleshooting steps helped me configure an SNS to S3 pipeline without building my own lambda or running something else like Logstash.

Wednesday, May 29, 2024

Questing Imperial Fist, a Black Templar Emperor's Champion


 I'm pleased with everything about this model. The black highlights sell the shiny armor, and the whites are creamy without being dull. A non-metal metal blade doesn't feel too out of place witht he gold highlights, and my freehand Imperial Fists tilt shield introduces some complementary colors to the purple beads. The eye lenses and a trace of OSL from the lantern give it a glow without making it gratuitous. The fact that I acquired it as a part of a cheap Craigslist lot makes it even better.  It was practically free. A++. Would Hobby Again.


Saturday, May 25, 2024

Cyberpunk RED - Rockerboys

Cyberpunk RED miniatures from the Rockerboys faction. Tried to evoke lots of 80's Vaporwave and retro-future Miami Vice with the color choices. The Manager has some of the most effortlessly awesome eyes I've ever done, and the skin and hair on the Guitarist just glows. The assembly was kind of a pain being resin, and you might notice some mistakes if you look too closely as these are tiny tiny minis. But I enjoyed it more than I thought I would. Hopefully, I get to paint more if they keep doing that system.

Manager


Guitarist


Keytarist

Nolzur's Marvelous Minis - Palette Cleansers

I call these small projects Palette Cleansers because I paint them in between other big projects like whole army units or big figures and terrain. The Nolzur Minis by Wizkids are cheap, already assembled and primed. They can be frustrating with mold lines, but they are decent enough at 3 ft. These usually come in two sculpts per pack.  I picked one and surplused the other for trades or teaching others how to paint.

Golden Dragonborn Sorcerer


Classic Barbarian with Sword

Warmage with Spear

Mustard-colored Wizard with Staff

Bronze/Gold Dragonborn Cleric or Wizard with Staff and flowing Blue and White Cloak

Red Dragonborn Cleric with Green Mace

Purple Wizard with Green Fire and Staff


 Black Dragonborn with Spear and Shield


Knights of House Caro Mea - The Dark Hand

The Dark Hand, or Manus Tenebrae in High Gothic, is an ancient war machine that traveled the galaxy after The Overgrowth. Eager to reclaim their home world and the forges that wrought these old machines, the knightly house of Caro Mea has joined the Mechanicus expeditionary force. Its pilot keeps the restless machine spirit at the heart of the Dark Hand busy with forest-taming operations. And while the trees of Pholos IV are more hostile than most, recent skirmishes suggest it will be called upon to enter the fray against more heady foes.


After being assembled for 5 years, I finally got the courage to paint this lumbering mech of a Father's Day gift. The under-carriage was a straightforward Leadbelcher with Nuln Oil drybrushed to highlight, and the panels are where I spent most of my time. I'm particularly proud of the blue stripes that give the flat blocks of color subtle depth. In addition, this is my first attempt at decals in some time, and Micro-sol was a miracle-worker at keeping them from being shiny. I used a black Sakura Pigma 005 for writing the name on the chest scroll. The base was mostly an afterthought, and I hope the Necron that was tread underfoot makes a speedy recovery.


Details


Thursday, November 2, 2023

Drip Cup for Cast Iron Juicers


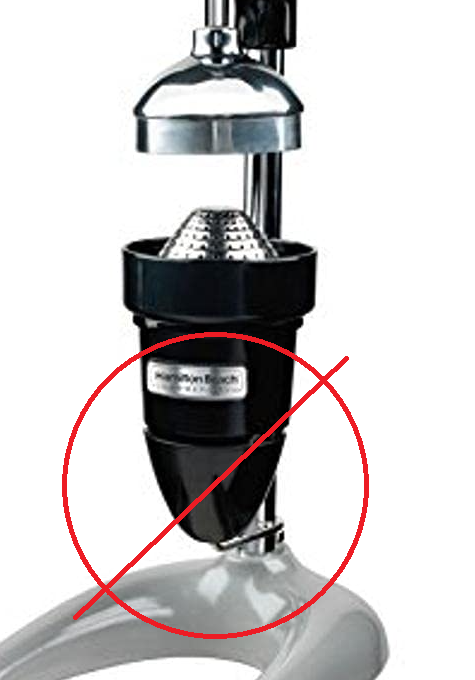
Hamilton Beach manual citrus juicers have a handy drip cup that swings out when you put a cup under the juicer, and it swings back into place when you remove your juice. Without this, the dripping juice left in the metal funnel can get all over your bar top, counter, or cutting board. If you have a generic cast iron juicer that doesn't have an attached drip cup, what is an enterprising bartender to do?

Print this thing I added to Thingiverse, of course!

The mechanism uses a rubber band of the right tension to return the cup to its initial position. As you push the cup to the side, guides slide the cup out of the way. The strength of the rubber band should be tuned to be light enough to not push over your juice cup nestled between the loving cast-iron arms of the juicer. When you remove your freshly squeezed juice, the rubber band slides the drip cup back into place. Et voila!

You'll need a rubber band, a conical shot glass (the smaller the better), and an M3 set screw. You will also need a set of hex keys to disassemble the juicer base to get the Shaft sleeve on.

Enjoy your drip-free juicer! Here are some prototype and action shots: