Showing posts with label Cocktails. Show all posts

Saturday, October 10, 2026

Ford Maverick 2026 Upgrades

It’s white. It’s got steel rims. It looks like a utility locator company truck. And I love it.

White ford Maverick truck parked in a driveway seen from the back at an angle

Here’s a running list of upgrades I’ve added or rejected from my base model Ford Maverick XL Hybrid:

  • Mabett Bed Storage Cubbies. The biggest upgrade was filling the spots in the bed with these two plastic cubbies. They fit just enough bungee and tie downs to do “truck stuff”. They come with 4 screws each, so be sure to get some M6 screws to fill all the holes.
  • Jump Starter. Hasn’t arrived yet, but the USB-C plug I installed kept draining the battery to nothing. Had to jump it. Humiliating. Get one of these instead.
  • Mabett cup holders and trash can. Tiny but mighty, this center console fills the gap below the charger block. The can stays centered in the Flexbed bracket, and I have an extra spot for empties on a road trip.
  • Mabett Mud Flaps. I had zero road grime after a trip to Seattle and back in the rain. Couldn’t have a better endorsement. Install by removing and replacing the stock clips.
  • Mabett Under Front Seat Storage. Just a bit of extra room for a first aid kit and other stuff I want but won’t need all the time. Keeps me from having to fill up the backseat storage so much.
  • 12V bed plug; particularly useful for running pumps for the stand up paddle boards. Just pop off the electrical cover and connect it up. You will need the key on to run the hybrid motor, most likely.
  • Mobile antenna for my Baofeng. Helped me get mobile and use my Ham license.
  • Tailgate Molding Rivets, Plastic. The ones on the tailgate keep breaking. I keep the pack in the truck. These are much sturdier.
  • Tailgate hole cover; mostly for paranoia factor of getting sand or rocks stuck inside the tailgate.
  • Hitch Hole Cover. Just plain vanity. The tail end looks chopped up without it.
  • Adeptus Mechanicus sticker. Heralding its arrival as a hybrid being, my steel steed gets an emblem of the machine god. Some day, when my flesh disgusts me enough (or my knees give out), I will join her in communion with the Omnissiah.
  • Snarky Plate Surround — BOUGHT A TRUCK — FOR THE GAS MILEAGE. My family is going to disown me when they see it, but I bet I’ll get fist bumps in the Fred Meyer parking lot.
Picture of license plate with number obscured. The license plate surround says “BOUGHT A TRUCK — FOR THE GAS MILEAGE”

It’s not all Xibit-style customization up in here. The Flexbed stuff is nice, but it needs to go further. The attachment bracket used for the trash can was supposed to be a Ford thing used across their line. Not sure it took off. I want it on the dash for a phone holder. I want it on the bumper for tailgating, add more cup holders or something. Make it sturdier. Make it universal.

Rejected Upgrades — these ones failed due to practicality, functionality, or budget reality:
  • Rough Country Tonneau Cover. As a former Ranger owner that had a fiberglass flat top installed, I love the idea of the latest covers, but I don’t find myself using the bed for anything but hauling right now. Since the bed is so small, removing it every time to store it in the garage seems like a pain. Check Reddit for the best recommendations. People really like the 3-piece ones. Hard Cover is better if you get snow.
  • USB-C in the bed. I couldn’t find one that didn’t stay active all the time and drain my battery. When I left town, I had to jump it when I got back. Since I uninstalled it, no issues.
  • Inverter in the bed. A 12v inverter is going to last longer inside the truck than wired into an open bed. Just plug it in when you need it into the 12v outlet. Get one near the tailgate with the 12V connectors..
  • Wired motion detecting lights. Just get a few magnetized LED handhelds from Harbor Freight and attach them in the cubbies. Mischief managed.
  • Under seat storage dividers. I’ve got the hybrid, so space is at a premium here. Just put a blanket under there to stop your secret stash from rolling around.
  • Rain guards for the window. Almost pulled the trigger on these after one too many drips in the drive thru. The in-channel ones were recommended. Instead, I keep a cloth in the door now. Helps wipe the dust from the Fischer Price interior too, lol.

Wednesday, August 20, 2025

How I Juice Limes in My Countertop Cast Iron Citrus Juicer

 Got a question on Reddit as to how I juice limes using my generic countertop cast iron juicer. I picked this up from a McMenamins bartender in Kalama, WA. Speeds up the juicing, gets more juice out, and makes it easy to press every last drop out.

First, cut a coin off one end:

Then add a small slice across the line about a quarter of the way into the lime. This opens it up a bit:

Stand your lime up on the juicer plate and crank it:


That’s it! You can also press the lime shell a bit to make sure all the juice gets got. I’ve only ever observed a teaspoon or so left behind, however.

Edit: I tested the above remaining juice on several limes. Between 1/6 and 1/3 oz Lime juice is left behind on thin skinned limes. Thicker varieties leave almost nothing.

Saturday, July 19, 2025

Jacking It, and by It, I mean Cider

I made Applejack from cider I laid down 3 years ago from local SW Washington fruit. Its destination is a Jack Rose cocktail (included below).


These days, Applejack is basically Apple Brandy distilled from cider (Lairds Bottled in Bond is the best), but it started back in the olden times being “jacked” from cider by leaving the barrels outside in the winter and skimming off the ice. Each freeze would remove water and leave behind alcohol and tailings.

Over the past month, I used the same mug I use for making clear ice to deep freeze, top down, an 8-pack of leftover apple-marionberry cider (thus the color). Each day, I took the frozen slush, dumped it into a shaker, and strained it using a Hawthorne strainer with a tight coil. It took about 4 days per 16 oz to get it down to where it would no longer freeze, about 2 oz remaining each time. A final trip through a coffee strainer removed remaining sediment from the collected product.

That process resulted in 375ml of rocket fuel you see here. A a final test, I tried freezing it one last time. As every child that tried to replace a tipple with water in their parents’ freezer vodka has learned, high enough ABV stops freezing. This one didn’t even have ice crystals after 48 hours. Tastes like a strong liqueur. Hoping I got it above 35%.

The destination cocktail is a grenadine-lemon-applejack combo, the Jack Rose. Have some leftover cider of your own? Give it a shot. Toast the pilgrims as you tip one back!
  1. 1 1/2 oz Applejack (Lairds Bottled in Bond or homemade, adjust based on ABV)
  2. 1/2 oz Homemade Grenadine (Morgenthaler recipe)
  3. 3/4 oz Fresh squeezed lemon juice
Shake with ice and strain into a chilled coup

Garnish with a lemon wheel

Thursday, November 2, 2023

Drip Cup for Cast Iron Juicers


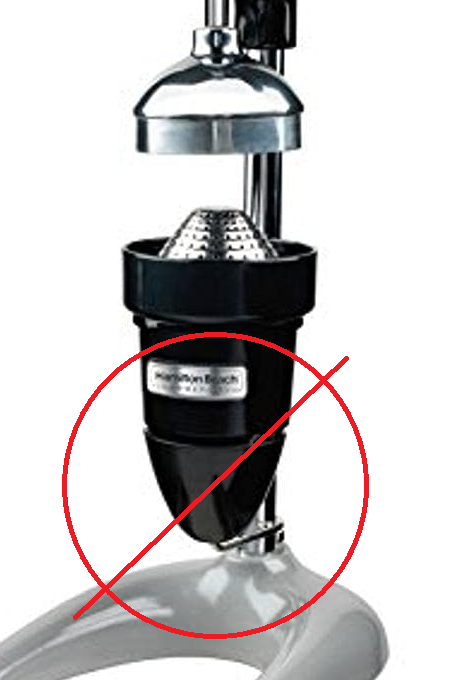
Hamilton Beach manual citrus juicers have a handy drip cup that swings out when you put a cup under the juicer, and it swings back into place when you remove your juice. Without this, the dripping juice left in the metal funnel can get all over your bar top, counter, or cutting board. If you have a generic cast iron juicer that doesn't have an attached drip cup, what is an enterprising bartender to do?

Print this thing I added to Thingiverse, of course!

The mechanism uses a rubber band of the right tension to return the cup to its initial position. As you push the cup to the side, guides slide the cup out of the way. The strength of the rubber band should be tuned to be light enough to not push over your juice cup nestled between the loving cast-iron arms of the juicer. When you remove your freshly squeezed juice, the rubber band slides the drip cup back into place. Et voila!

You'll need a rubber band, a conical shot glass (the smaller the better), and an M3 set screw. You will also need a set of hex keys to disassemble the juicer base to get the Shaft sleeve on.

Enjoy your drip-free juicer! Here are some prototype and action shots: