Tuesday, December 9, 2014

2014 Board Game Buying Guide

I've been playing games with people at the office, and it has shown me that you can get a game in with even a short lunch and new players.  I decided to put together a quick list of game recommendations based on venue and number of players.  Links to Amazon are provided, but most of these titles can be purchased from your Friendly Local Game Store.

Lunch

Bring co-workers together, let off some steam, and renew rivalries between departments with this selection of quick and easy games selected to allow you to teach and play in under 30 minutes.
  • Love Letter is a card game of bluffing and card counting with just 16 cards.  It handles 2-4 players, but it is best with 4.  Also, it comes in a number of different re-themes, so you can get a non-threatening version to appeal more to co-workers.
  • Tsuro of the Seas handles 2-8 players.  This "last man standing" tile game has compelling artwork, fast rounds, and dead simple rules.  A whole game seldom lasts more than 15 minutes so people can jump in with little fear of going over their lunch time.  There are simpler versions and expansions, so you can get as much depth as you want in the time allotted.
  • Hey That's My Fish plays well for between 2 and 4 players.  You should be able to explain rules while setting it up.  All about area control, the gradually shrinking board is apt to cause panic even in the normally stone-faced players from Finance.

Date Night

Games that play best with or are designed for just two people can test the limits of your affection or bring you closer together (no warranty either way).  Though these games will work at work, teaching might take longer so an hour lunch is preferred for newer players.
  • Hive is one of the few abstract games on this list (like chess or checkers).  It presents the elegance of chess without a board, and the pieces have heft and make a wonderful clacking sound like Majong tiles.
  • Jaipur is a colorful trading game whose tokens and cards make a visually impressive setup.  The 2 of 3 mechanics means it is natural to play round after round.  This game used to be rare, but it has benefited from a recent reprint.
  • Star Wars X-Wing Miniatures Game maxes out the nerd factor.  This is as close as you can get to a war game, so check with your significant other before taking the leap.  Games run about 45 minutes, and it plays in a space the size of your dining room table.  Best of all, there are endless expansions to add iconic and obscure characters to your fleet of ships.

Family/Friends Game Night

Have more than two?  Hate Monopoly as much as I do?  This mix of competitive and cooperative games are sure to show you what the modern board gaming renaissance is all about.
  • Forbidden Desert is a cooperative game where you play against the game to avoid thirst, storms and the heat to get out of the desert alive.  The mechanics and components are top notch, and it plays in under an hour.
  • In King of Tokyo, players take the role of giant monsters vying for control of Tokyo.  A fast paced dice game, the randomness and ridiculousness of it all is a hit.
  • Card game The Builders: Middle Ages is a great worker placement game: hire and set workers to build a town.  The rules are simple, but the gameplay is complex.  This definitely benefits from replayability and the tin means it is sturdy enough to go anywhere.
  • Love Scrabble but have that one friend that outstrips you every single game?  Try Qwirkle for scrabble like crosswords without the burden of words.  It is more puzzle than game, depending on how cut-throat you get.
  • Ticket To Ride: Europe is rummy with a board, and this edition of the game is fantastic.  I learned more geography from this game than I did in grade school, and the artwork is fantastic.  Expansions are available and cover alternate maps and expanded ticket options.  It even has an App version you can pass-and-play if you don't want the fancy box.

Monday, December 8, 2014

Clark County, Nevada Elder Abuse Resources

I was concerned for the safety of a family member who is older not long after their spouse passed away.  Below are some things I learned about Elder Abuse, the resources available to help those in need (individuals or family), and things to do when investigating elder abuse.

Before going nuclear on someone new in your relative's life, first do the single most important thing: talk to your older relative.  Often, misunderstandings or matters of privacy can be sorted out without resorting to law enforcement, state assistance or subterfuge.  The matter of trust between you and your relative is the single most important factor in maintaining their long-term health and well-being.  If you lose their trust, you lose almost all ability to help them.

Local Police Resources

Police seem to only be able to make 'welfare checks' for elderly people that outsiders suspect are being abused. They can only visit the premises when the person is home. The Las Vegas Metropolitan Police Department Operator and Dispatch informed me that there are dedicated Elder Abuse detectives. Unfortunately, they only operate M-F, 7-4. As the crisis was after this time, we couldn't get a welfare check immediately. The numbers for these departments are below:
  • Metro Operator: 702-455-8697
  • Metro Dispatch 702-828-3307
  • Elder Abuse Detectives: 702-828-3111 (Hours are 7-4, no voice mail)

State Resources

Though I I have not taken advantage of these resources, there may have been help available through the Aging and Disabilities Services connected through the county. Comparable services may exist locally in your neighborhood.  Perhaps there are some interventions that would be helpful going forward?

Social Engineering

When trying to find out more about people that have entered a loved one's life unexpectedly, unexpected phone calls from unknown people are a great source of more information.  Generally, act as if the person is at home but not available.  The person on the other end of the line may divulge information that gives you clues about the intruder.  Effective phrases are below:
  • "Yeah, he's here but he's busy.  He asks what you need."
  • "Hold on, let me get her...She's here but can't pick up right now."
  • "Who is this again?  I didn't get that down last time."
  • "His phone is dead.  What number can he reach you at?"
  • "What was it again that you're meeting for?"
While the person is out, check the circumstances of the house, but try not to disturb things too much.  Look for signs of drug abuse, behavior you know your relative would frown upon such as smoking and drinking in the house. If you know their location, ensure firearms are secure, and check the status of belongings, heirlooms and money caches.  Document and narrate your search by video.

If you must get the police involved, minimize the impact on your relative.  See if they will come around when you try to have a person escorted off the property.  Ensure your relative is not involved in any illegal activity before involving the police, and, most importantly, get the consent of your relative before escalating.  You must maintain their trust, and asymmetric reactions to otherwise benign or diffusable situations can ruin that bond and expose a vulnerable relative to harm from both the intruder and the police.

Wednesday, November 5, 2014

R00tz Asylum 2014


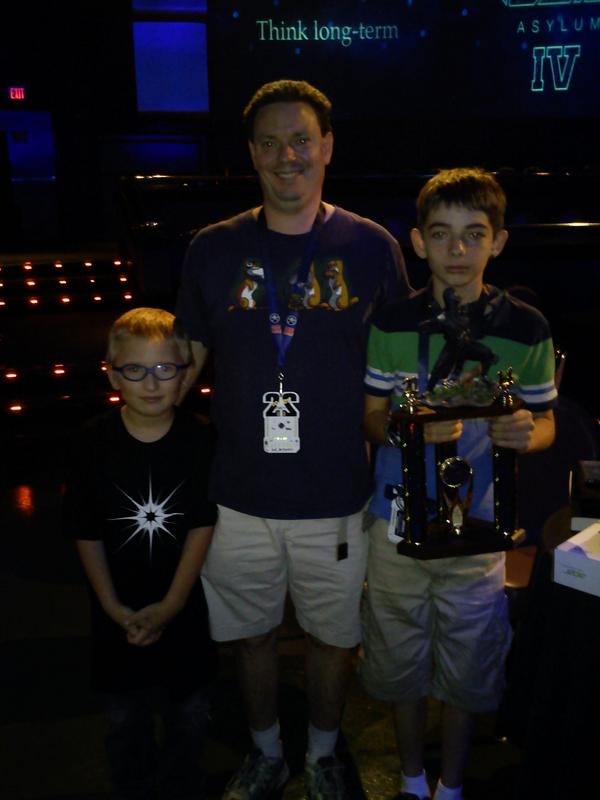
I took Ethan to the event run in parallel with DEF CON, R00tz Asylum.  I think he had a blast as they covered a lot of traditional hacker topics at multiple levels of complexity.  The highlights are below.

Structure

The event was held in the Crown Theater at the Rio.  It was about a 10 minute walk from DEF CON proper.  The separation was nice as it made for a more quiet and contained experience.  The stage was occupied by a speaker almost all the time.  Spread around the perimeter (mezzanine?) were tables with activities that changed every day.  Kids could choose to listen, play or work on challenges.  Most activities stayed the entire day, though some were more transient.

This setup was advantageous for my son.  He has little ability to focus on any one thing for an extended period of time, so the variety of activities was nice.  Much like its parent conference, R00tz Asylum did well when it focused on hands-on learning.  Toool, Google and Wickr held contests and learning opportunities that pushed attendees and their parents to participate together.  In particular, Ethan loved the puzzles, and I finally got him to solder something.  He did a bang-up job.

Speakers

The speaker experience was less than optimal with a few notable exceptions.  The stand-outs were Gene Bransfield's hilarious "Weaponizing your Pets" and Meredith Patterson's engaging activity "The Telephone Game" about Man-in-the-Middle attacks.  Special mention goes to @muffenboy and Esau Kang for being kid attendees and speakers.  For the rest, it would be good to learn that speaking to children is not the same as speaking to hackers, and most talks were too technical, lacked a hands-on component, and thus ended up being torture for the little ones.  From speaking with the organizers, I can tell this is something they are trying to focus on next year.

The Gift

R00tz Asylum is the opposite of DEF CON in one respect: it relies on sponsors to add pizzazz and to make ends meet.  One of those traditions that may or may not hold in coming years is the gift of a hackable piece of technology to attendees.  This year brought ASUS Chromebooks care of Google.  My son was enthralled, and I spent most of the conference convincing him to get off the Chromebook and out to the activities.  By the end of the conference, we had Linux in addition to Chrome, and we were running Wireshark thanks to perseverance by Joe and Chris, a father/son team.  This effort won Chris a trophy, even.  My son begged me to put Minecraft on there, but then quickly forgot how to get back to it and reformatted his Chromebook undoing all our hard work.  Hats off to Google, and congrats to Chris on the win.

Embedded image permalink

Hardware Hacking

By far, my favorite part of the conference was the Hardware Hacking table.  Not only did the goodie bag include a HakTeam Throwing Star LAN Tap, but a table full of old equipment was available from which attendees could rip apart and salvage components.  The LAN Taps were used in an activity that taught wireshark and packet sniffing.  The hardware component salvage table was exploited for speakers, LEDs, gears and motors for all sorts of toys.  I am definitely bringing projects for Ethan next year.  I already recommended the salvage table to the official DEF CON Hardware Hacking Village.  Las Vegas thrift shops may see a run on their printers, VCRs and routers before next year's conference.

Lock picking

The one talk and table I was surprised that Ethan was interested in was from Toool.  Their interactive 101 talk caught his attention, and we worked on a lock at their companion activity table.  Though he ended up losing interest before successfully opening a lock, it gave me a clue of the type of activity he could do on his own between conferences.

Going Forward

I would definitely recommend any hacker parent to bring their child to R00tz Asylum.  Its expanding and evolving to be a great summer camp weekend that dovetails with the DEF CON experience.  As the organizers ger more experienced, I expect the content to grow and change to fit the kids and their interests.  We all started somewhere, and I hope R00tz is that start for the next generation.  I started a subreddit for R00tz, though it hasn't taken off.

As for Ethan and I, we are preparing a talk on how to hack Skylanders figures.  We hope it will be a fun combination of encryption, hardware hacking and games that will draw the attention of attendees and inspire them to really dig in and explore the technology that is used around them every day.

Friday, October 31, 2014

Resources to Check for Dead Links on a Website

http://www.brokenlinkcheck.com/
This external service hits your site and follows each link.  It is intelligent enough to check for loops.  Since it is an external service, it may artificially drive up hit count.


Check My Links Chrome Extension
This very handy chrome extension checks link status and places the results in-line.  Fairly turn-key, it even keeps a list of links to not follow that you can add to as you go along.  It seems to have trouble with blogspot controls and extensions, though adding them to the blacklist might be the solution.

Xenu's Link Sleuth
Heard about this one on UTest.  I am eager to try it out.  Free, long history, and automatable: all the right pieces for success.

Add more as you find them to the comments.

Thursday, October 30, 2014

StarWest 2014

I viewed StarWest's Virtual Conference offering again.  This and the affiliated Better Software conference are run by Techwell.  A few observations.


  1. I loved the talk on Healthcare.gov given by Ben Simo (@QualityFrog).  He communicates how easy it would have been to predict, find and fix the problems that would plague that site for more than a year.  It was a good choice putting him on keynote.
  2. To attend one of these conferences will run you or your company into the thousands of dollars.  Attending the tutorials is even more.  This in spite of being sponsored by some of the biggest software providers in the industry.  We are bombarded by ads for the latest ALM or bug tracking tool and they are called talks.  What is such sponsorship getting the attendees?  Who is benefiting from this other than the organizers?  If the conference organizers were a not-for-profit, would they charge the same amount?
  3. The online offering tries to simulate the networking opportunities for those who could not attend.  It tries to simulate the marketing side too by giving attendees contact info to vendors.  What about the testing opportunities?  With more than half the talks about web app testing, why aren't tutorial sites and learning apps available and promoted to virtual attendees?
Maybe DEF CON has spoiled me.  $200 for the most frenetic hands-on conference over twice the number of days?  A lot of that is a labor of love and volunteers, but then again most of it is also not sponsored by corporations too.  Maybe I need to bring DEF CON to testers, or testers to DEF CON.  See what shakes out.

Thursday, October 2, 2014

Cards Against Mormonism

My brother and I grew up Mormon, but we no longer identify as such.  Nevertheless, the culture is unique, and there are many opportunities for squick, in-jokes and dark humor.  So, like everyone and their mothers, we decided to roll some of those up into an unofficial Cards Against Humanity expansion: Cards Against Mormonism.  A reminder: you may not get some of the jokes if you have never been Mormon, lived in Utah or or are otherwise considered a Gentile.  However, we took great pains to limit the amount of Utah-specific jokes.

The cards themselves were brainstormed under the influence of alcohol and put through the refiner's fire until about 100 unique cards (33 Black and 80 White) emerged.  Once the list was solid, we copied it into the brilliant Cards Against Humanity custom card batch processor.  It worked flawlessly the first time marking Pick 2's and adjusting fonts as needed.  This spat out two PDFs perfect for printing your own Mormon expansion to Cards Against Humanity.

This set is formatted to match the free print-and-play PDF still available on the CAH Website.  Like that set, it is shared under a Creative Commons BY-NC-SA 2.0 license.  You can see the original doc with those that did and didn't make it in Google Docs if you want to try your own hand at it and bring some apostasy to game night.

Sincerely,
DuncanYoudaho and FannyAlgersAbortion

Download Links:
White Cards
Black Cards

Monday, September 29, 2014

Test Early, Test Often

Of late, I have been enamored of testing techniques that come earlier and earlier in the development cycle. It can be called static analysis, design auditing, prospective testing, shift -left or the like, but the research is in: testing before you get something bears fruit in most organizations.  Here I present a few examples from my own experience.

At the start of a sprint, we leave Sprint Planning with the requirements.  The next interaction with developers is when we review their Developer Design Overview document that spells out the development approach and helps QA scope their testing effort.  This developer had chosen to put an error message into a file usually reserved for configuration.  QA saw the DDO and raised concerns immediately.  Why was a message being added to this file when they were usually reserved for the language DB?  With this one question, before QA saw the code, we changed the trajectory of development.  The fix was in before we got our first build, and the story closed with the Sprint instead of carrying over with the do-over.

An even earlier example came when we looked to implement secure communications between two servers.  While I couldn't code my own implementation, I was able to provide recommendations at design-time by staying educated and confirming my understanding with developers who had dealt with crypto.  By starting early, we were on surer footing when troubleshooting and confirming the implementation was sound.

As the examples above illustrate, QA often saves time for developers by defending standards and consistent implementation early in the cycle, but that is not the only savings that comes from shifting left.  Often, test environment issues can also be aided by an early understanding of requirements.  In one case, as story had carried over from a previous sprint which meant we were already behind.  The roadblock was a production issue pulling the developer away from the story.  Instead of sitting on our laurels, QA worked with the configuration manager to make sure our test environments were ship shape before the code was completed.  When the developer's changes passed build verification, we were off and running almost instantly.  Not only did our preparation help us get to the work of testing faster, but it also helped us close more stories as environments were made ready before they could become an obstacle. Not only was I able to test early, but it lead to me testing more and in greater depth.

Most modern test engineers have their own war stories from early testing.  For every story where requirements changed and early notes became meaningless, there are ten stories where early questions lead to greater clarity, fewer bugs, and more time for digging in.  I consider projects that foster this early access for QA to be among the most fruitful and least volatile.

Monday, August 18, 2014

RadioShack LED Strip Driver

I modified the Pololu RGB LED Strip drivers from version 1.2.0 to support Radio Shack's behind the times model that is 30 LEDs controlled in 3-diode sections.  I had to swap the colors around to match this pinout, and I changed the struct to a class (because why not).

The fix was to physically reorder the declaration of red/gree/blue variables in the struct declaration.  This way, when the information is written to the strip, it is sent in a different (and now correct) order.  You can make the fix yourself by changing the file PololuLedStrip.h:
typedef struct rgb_color  {    
   unsigned char red, green, blue;  
} rgb_color;
becomes:
typedef struct rgb_color  {    
   unsigned char green, blue, red;  
} rgb_color;

And here it is on GitHub: https://github.com/RangerDan/RadioShackTricolorLEDStrip


I should probably talk to Pololu on licensing concerns here.  I found the license from the original driver and copied it into my repo.  I couldn't figure out how to fork this properly, so I just re-uploaded it until I understand git a bit better.

Friday, August 15, 2014

C3BO: Proof of Concept using Timbermanbot Schematic

This post is part of a series about building electro-mechnical PIN-cracking robots, R2B2 and C3BO.


This is a proof of concept for @JustinEngler's C3BO (https://github.com/justinengler/C3BO) using transistor controlled relays. It was prototyped by modifying Blink from the Arduino sample project.

The schematic was obtained from Timbermanbot (https://github.com/vheun/ArduinoPlays...) as seen on Hackaday (http://hackaday.com/2014/07/26/pwning...).

In the video, You'll notice I've replaced the touchpad for your finger with a wire to the headphone jack's ground as the circuit ground. The two pieces of copper tape were no longer sticky enough to stay by themselves, so I am holding them down. They press two and 5 with about 8 key presses per second.

Monday, August 4, 2014

OFBC: Putting it All Together

Note: This is part of the Project Write-up for OFBC: One Fluorescent Beer Coaster

After months of effort, we had a circuit, PCB and shell design to accomplish our goal.  Putting it all together meant solving some unique challenges in the home stretch.  By far the most communal part of the project was finishing the circuit.  Parts were bought by three different people.  It took hours of trial runs and four different nights in my shop to finally get the circuit assembled and ready.  In all, the project taught us to keep moving in spite of obstacles.

Internals

The main obstacle was PCB manufacture.  As detailed in that post, uncooperative copper and etchant lead to abominations not fit for solder.  Drill bits broke in PCBs, holes were misaligned, and traces were torn up as we worked and reworked the boards.  The major blunder was the reversed PCBs, but it was tempered by the lack of polar components.  Only the transistor and MOSFET needed to be adjusted when we realized our mistakes.  The quality checks and encouragement as we worked as a definite plus.  There were several times I wanted to just give up and abandon the project.  Truly, I get by with a little help fro my friends.


After the PCBs were in our hands, the task of soldering all the components was a team effort.  One person ran continuity tests on newly etched boards.  Another bridged scratches and pasted down traces.  Buttons (functional and fake) were inserted and crimped at one station while a fourth person began to solder on components.


That moment of truth when the LED lit up was breathtaking all nine times it happened.  When it, more often than not, didn't work on the first try, the scramble to troubleshoot was a team effort as well.  A loose connection, bad trace or through hole in need of a reflow was rooted out in minutes. I can't describe the feelings from closing the box with nine functional copies of the idea sketched out on a picnic table the year before.

Externals

Shell manufacture forced choices between what we wanted versus what we needed.  The mechanical ideas at the outset gave way to manufacturing considerations.  Features were pared back to match timelines, work schedules and summer vacation.  Anyone reading this who has worked in an Agile Development environment will recognize similar decisions they make every Sprint.  To borrow a cliché, "Perfect is the enemy of good enough."  With this in mind, we have an eleventh hour compromise ready: should the 3D printer prove a roadblock, we have arranged for a Wednesday night Hail Mary meeting to turn Ziploc Containers into eternal glory.

The Ziploc idea produced 4 "just in case" models.  We stabilized them with glass beads and hot glue.  The containers became the shell and mount for the PCB.  The beverage lid was provided by another ziploc container hot-glued onto the buttons.  Hot glue for grip and stabilization of the platform finished the job.  See the result in the pic below next to the finished shells.


Luckily, the 3D Printer roadblock was cleared just two days before the BBQ.  Poor quality filament lead to clogged extruders.  After a good cleaning, we were back in business.  5 shells total were produced with various upgrades.  We got a top that nested well with the shell, and the mouse-hole in the shell was added to allow the USB to be passed out of the body.  We did not get impressions in the top to get the lid closer to the lens of the LED.  We also did not get any part of the body held together by magnets.

Final assembly took place at Toxic BBQ itself.  The lights stayed on this year, but we started conversations and passed out some business cards with links here.  We placed a few on the tables farther out that didn't have light, and we presented two to the organizer in a Utilikilt.  Furthermore, it went on display in r00tz and the HHV for most of the convention.

Final Word

I left DEF CON for two years running with a profound sense of my own shortcomings.  I saw people around me doing amazing things, but I couldn't point to similar achievements for myself.  Though not terribly complex (most ideas came from Instructables, after all), the process and coordination required to pull off this simple idea has been eye opening.  It all started by pivoting from planning to doing.  It finished with an 80's-montage-worthy string of late nights and high fives.


Already, these efforts are fertile ground from which numerous other ideas have sprung.  Facing another DEF CON, I'm looking for the next big project instead of lamenting my noob credentials.  Only time will tell how many of these work their way to reality.

Sunday, August 3, 2014

OFBC: Shell Fabrication

Note: This is part of the Project Write-up for OFBC: One Fluorescent Beer Coaster

Design

In parallel with the circuit, we designed an enclosure that would be more sturdy than hot glue and disposable containers.  The general idea was a shell with a lid that had some travel.  Our first designs focused on a mechanical clip to lock the lid in place.  Further ideas were a rail to keep drinks stead, a drain channel for condensation, and an interlocking base/top for easy stacking.  Our lack of expertise with the 3D design software and the complexity of the print made us go back to basics.


Similar products used a coaster shape, so we started there. As the whole point of this project is to show off, we wanted to make it easy to disassemble top and bottom. To make this happen, we settled on magnets instead of screws for both top and bottom.

First Full-size Print (with Frenchman Mountain in the Background)

Problems

First, the 3D Printer needed to be calibrated, then the extruder needed to be cleaned, then the Kapton tape needed to be replaced.  After a much better test print, we got our first dimensional fit.  Once the PCB was together, we realized two things: 1) the buttons we bought had a much heavier mechanical action than the test buttons and 2) the LED package was too tall for the way we printed the top.  Combine the two, and a lot less light was reaching our girly drinks.  Something had to be done.  The above problems were noted, and various other edits were written directly on the 3D printed shell (a sharpie on white ABS works wonders for clarity).  They were handed off to our man with the printer while the rest of the team worked on PCB fabrication.

Between orders of Kapton Tape - Let's try Painter's Tape!

It was about 10% too small.  Looks like a job for Superm*n!

Not nearly as bright as it should be

Solutions

The final prototype came together the weekend before DEF CON.  Edits to allow the charging cable to escape from the bottom of the case, a drip cover to prevent condensation from entering the shell, more accurately nested tops and bottoms, and a host of other small changes came together for the final prints. In all, the first run is bulkier than we imagined, but we have discussed ways to miniaturize and reduce costs across the board.  It will be something we are proud of showing off.

The 3D printer was the final obstacle.  From miscalibration to a clogged extruder head to a stepper motor burning out, we had our fair share of problems getting the final package in a physical format.  If the repairs don't come through, we'll be manufacturing stand-ins for the Toxic BBQ.  Nothing can stop us at this point. 

The current Sketchup files will be available on the OFBC project on Github.

Great Size, Less Filling

Tuesday, July 29, 2014

OFBC: Random Design Shots

Note: This is part of the Project Write-up for OFBC: One Fluorescent Beer Coaster

Puzzling Out the Protoboard

Can you Smell the Confusion?

Shell Designs

Initial clip-together design with rails for stable drinks

Circuit, post and spring and modified clip-together designs

Hockey Puck design emerges, Boolean shape building discussions

First practical attempt at dimensional design

OFBC: PCB Fabrication

Note: This is part of the Project Write-up for OFBC: One Fluorescent Beer Coaster

From Protoboard to PCB

The next step along the path was to turn a gawky mess of a protoboard into an elegant example of good design.  This step took a lot less time than I thought it would thanks to Fritzing.  Billed as "Electronics Made Easy", I installed and got up to speed in under an hour.  Conversations with my compatriots helped me tweak and massage the design to our satisfaction.  The end result is a 2" (58mm) PCB for through-hole components.  This will secure the buttons, driver and LED while connecting to the battery.  The experienced among you are probably thinking how absurdly large that it.  It could be a lot smaller, but I consider it acceptable for a first run.  As with other projects, the latest version of the fritzing file will be available on github.


First Run

If I had to pick one part of this project that made me more uncomfortable than any other, it would be the PCB fabrication steps.  I took chemistry in High School and College.  I know the basics.  However, I don't know enough to do it confidently.  I took my queues from MAKE's excellent video tutorial, acquired chemicals at Frys, harvested glass from a recently disabled printer/scanner, and printed transparencies at FedEx Kinkos.  My exposure light was a 26W CFL in a desk lamp.  My red light was a red LED straddling a button cell.

Sneak peek at the Shell prototype

I removed the board from the developer too early or exposed it to too much light. This caused a large region of copper to not develop. There is no way to align and cut a ton of these after the fact. The PDFs exported from Fritzing come out one per page. This means they need to be done one at a time unless you have the skill to post-process the PDF into multiples per page. I pre-cut the PCB's during subsequent runs. My table saw made short work of the big board, and the pre-sensitized copper has a sticker over it that allowed me to cut the board to pieces without compromising its ability to accept an image.

Oops 

Once the etching was complete, I drilled out the traces.  The prototype board was drilled using a 1/16" bit.  This was way too big.  Out of all the bits I tried, normall through-hole components worked great with a 1/32".  A 1/16" bit was required for the MOSFET, however.  The best set I found was one for the Dremel.

Modern Silk Screening ain't got nuthin' on Sharpies

The only part of the process that ended up being perilous was the disposal of the ferric chloride.  The leftovers are back in the bottle.  I'll take them to the waste disposal place soon.  My driveway has a nice big rust spot on it from where I washed off the etchant.  How am I going to explain that to the HOA?  Ultimately, the problems with Ferric Chloride lead me to a different etchant entirely: Cupric Chloride.  See below.

Production Run 1

With the test run experience in hand, we were set to make an attempt at our first full run.  I chopped the boards on a table saw first.  This was a stunning success.  I also redesigned the PCB to include a slide switch to kill the circuit.  This allows long-term storage as a shifting bag or box won't depress the pressure switches and drain the battery.  You might see on the random design shots how we were planning on mounting the LED to the lid.  This changed before the final production PCB run, and we moved all traces outward to make room in the center of the PCB for the LED module on heatsink.  I also added a copper pad in the center to maximize heat transfer.  Some thermal paste will seal the deal.

The exposure took place in the half bathroom.  With access to water and no exterior windows, it was perfectly suited to etching.  Our supplies were:

  1. Tape, transparencies and pane of glass.  The circuit image is taped to the glass in a double-thick layer.
  2. Positive Developer mixed 10 to 1 in a glass pyrex.  When in doubt, use pyrex to ensure things won't melt through the container.
  3. Desk lamp with a sifficiently bright CFL bulb.
And our steps were:

  1. In darkness, peel off protective layer from light-sensitive copper clad board.
  2. Position the board over the top of your image and tape down.
  3. Flip the glass pane over and double-check the board is positioned correctly.
  4. Expose for 8 minutes using the lamp.
  5. In darkness, remove the board from the glass, and place it in the positive developer.
  6. Swirl the PCB in the solution until the image appears.  If your developer is sufficiently diluted, longer development times will be experienced.  It is better to over-develop and start to lose the image than it is to under-develop and end up with no traces at all.
  7. Wash off the board when it is sufficiently developed,


Final Exposure Workstation (The Guest Bathroom)

After exposure, good boards were placed into the etchant.  The Ferric Chloride was a great big mess.  It was hard to see how the process was coming without fully removing the board.  In addition, it needs to be heated to be truly effective.  Las Vegas has an ambient temperature of 100F/ 38C, and it still took 30 minutes per board.  You can see the etched boards below.  Before soldering, the etch-resist is removed via acetone.

Finished Product on the Plate

Great Success!

Production Run 2

With DEF CON a week away, we didn't have enough boards to complete our goal yet of nine complete lights.  We met for what we thought was our last etching party.  Much like the previous time, we decided to expose and etch using Ferric Chloride.  These boards looked great.  It was obvious we were starting to figure out how to do this effectively.  Unfortunately, we also forgot to check the boards as they were produced.  All 3 good boards were mirror images of what they should have been.  DEF CON loomed large, and we went with the more radical solution: switch etchants and try again.

The new etchant relied on Cuperic Chloride.  Once again, I turned to Instructables for a helpful tutorial.  The key ingredients were muriatic acid and hydrogen peroxide.  As the link shows, the acid and hydrogen peroxide oxidize the copper to form CuCl.  This in turn oxidizes to form 2CuCl by stealing copper from the PCB.  What's better, it needs an acid refresh much less often, and it is completely reusable.  A bubbler or aggressive mixing causes oxygen to oxidize with the 2CuCl and start the cycle again.  We obtained new PCBs (see my rant about Fry's below) and went to town.  We ended up with the 9 boards we needed; we began assembly in earnest.

Lessons Learned

The first board we did had the light placed too close (1-2 inches).  Also, the positive developer was extremely strong.  This caused all of the etch-resistant coating to wash away.  A little more water and moving the light 6-8 inches solved that problem.  When we were doing it right, we waited for the image to appear and then become crisp.  It is extremely difficult to tell in the dark if the image is still cloudy or not.  When in doubt, dilute your developer and leave the boards in there longer.

As with my woodworking posts, the matra is, "Measure Twice, Cut Once."  After every critical step, we had one person check another's work.  This saved us time and again from poorly aligned boards, undrilled holes and bad decisions at the bench.  It didn't save us from all screw-ups (a full crop of mirrored boards), but it saved us other embarrassments.  It also exposed every team member to each point in the process.  In total, five people participated in the manufacture of these boards.  Most have projects lined up that take advantage of things learned along the way.

The boards themselves were a problem, and they highlighted a weakness in the supply chain.  All copper obtained from Fry's failed at least a third of the time.  Online, the consensus was that the boards were old or improperly handled.  The positive developer was much stronger due to being partially evaporated.  The buttons we obtained were stiff and of differing quality that those used in prototypes.  All in all, I would recommend avoiding Fry's if you can help it.  They might have enough materials to get you going, but Amazon or similar suppliers can get you what you need fast enough that it makes no difference.

Space Hulk: Death Angel in a Cigar Box

The Plan

Space Hulk: Death Angel is a 1-6 player card game as brutal as its predecessor.  It has a ton of expansions, and it quickly outgrew its box.  I love to play this as a time killer while waiting for family or board game night to start.  It is brutal enough that it could be over in 5 minutes, but it is complex enough to withstand repeated plays.  I wanted a replacement box to be sturdy enough for for transport with the modern features of board game boxes that made parts easy to find and keep organized.  

I decided to go with a black Sancho Panza box.  After the labels were removed with acetone, I removed the inner lining and deororized the whole box with Odor-xit, an amazing oxidizer.  I lightly sanded the inside and blew it out, just in case.

Modern enhancements were card sleeves and push.pop style card storage.  Card sleeves let me play almost anywhere.  The Fantasy Flight sleeves were well matched for size.  The push/pop method of card storage was introduced to me with Lords of Waterdeep.  The insert in that game allows you the push down on one side of a deck of cards and pop up the whole deck at once.  No more groping in the bottom of the well for that one last card.  

Once I had my features, I sketched out a plan.  I calculated the height of the interior of the cigar box, and I left a little room for a rule book to sit on top.  The cards would be separated into six piles.  With the different expansions, this worked out pretty well.  Sleeved, only one pile gives me trouble and slips out regularly.  Each partition was made from 1/4" baltic birch cabinet plywood I had a sheet of.  This stuff is great for ripping into strips.  I used it on the Dominion Case as well.  I then notched the corners to make sure they fit in the box easier.  The final step was to cut slots into the horizontal divider and a single slot in the vertical dividers.  This was mostly done by feel.  I cut the outside edges, cleaned up the center and tested the fit.  This was repeated until I was satisfied.


Overall, the box had dramatically improved the portability of the game with all its expansions.  The box complements the game itself in its simplicity and order.

Lessons Learned


  1. I did not leave room for the rule book at first.  I had to chop down the height of the dividers once I realized the oversight.
  2. I originally slotted the vertical dividers x 2 on the wrong side of the measurement.  This left half of the cards with a much tighter fit.  It took me a it to figure out what I'd done, and I was unable to salvage those dividers.  When making cuts in "The Middle", ensure you have things in the exact middle by flipping your pieces around once they have been marked.  The middle should be in the same place on both pieces.
  3. Removing the exterior lining may not have been the best way to do things.  The biggest problem with this box is that the cards will slip out through the gap between the lid and the bottom.  Moving the push/pop dowels to the outside edge could fix this too.  The sleeves would probably need to come off if the second option was used as the interior would lose 1/16" on all sides.
  4. Salvaged cigar boxes need better hardware.  Especially when transporting them, it is important that all components remain secure.  A swing latch could greatly increase the ability to keep the lid closed beyond the simple latches on the cigar boxes.  I'm going to pick some up and make some recommendations in a future post.

Monday, July 28, 2014

DnD Table 3 and 4

Preamble

Our gaming table has gone through many phases.  The first was an 8x4 foot sheet of plywood on some sawhorses.  We wrapped it in felt and stapled it down, but the felt kept pilling and it was hard to replace.  We chopped it down to 6 feet, split it down the middle and swapped vinyl for felt, but the legs were still hard to store.  The third mod was to replace the cumbersome legs.  The fourth was a new and lighter table top.

This has been useful for gaming, crafts and many other activities.  It is light weight and takes up very little room.  We keep ours in the garage and pull it out when we need it.

The Legs

Lowe's had some really nice seasoned 2x3's.  A few hours and chop saw got me a new set of legs.  The chief features of the table are its simple construction and plentiful leg room.  It has been a chore to find a good way to attach the top to there, however.  Overall, the legs have been maintenance and trouble free.  If I borrowed the design from somewhere, I have forgotten it.  If you attempt to replicate it, read all instructions first, measure twice and cut once, and always wear your safety glasses.

The cut list is basic and can be created from six 8 foot 2x3's, Not compound angles are needed, but the legs have angled cuts.  The measurements below rely on the geometry of your lumber being moderately predictable: Two 2x3's together should come out to 3 inches.  You may have to adjust the length of your interior cuts if this is not the case:
  • Outside Length: 72" x 2
  • Inside Length: 69" x 2
  • Outside Width: 27" x 2
  • Inside Width: 21" x 2
  • Legs: 30"+ x 4
  • Blocks: 4 1/2" x 2 1/2" x 4 (mine are from oak as that's what I had lying around)
  • Lots of 2 1/2" construction screws
  • 4x 5 1/2" Carriage Bolts with Washers and Nuts

Assembly of the top is also basic.  Remember to drill pilot holes for all screws ans work from the inside out:
  1. Inside Width -> Inside Length 
  2. Inside Length -> Outside Width
  3. Outside Width -> Outside Length
The legs can be tricky to position depending how high you want the table top.  For my 24" height top, the legs are 26 1/2" with a 75 degree cuts at both ends (making a parallelogram and not a trapezoid).  The legs meet in the center of the table top.  The math to place the hole precisely has been lost, but those inclined should have no trouble replicating it.  In general, slip your uncut legs into the slots between the Inside and Outside Length so that they meet in the middle.  At a point between 9 and 11.5 inches from the end of the table end, drill the hole for your carriage bolt through both Inside Length, the Leg and Outside Length.  Make sure the hole is not closer than 2 3/4" from the end of the Leg.  Thread the bolt through the hole and test your leg height.  Cut your leg into a parallelogram to maximize contact with the floor and minimize interference with the table top.  Position the Blocks to ensure the legs only rotate a certain amount.


If all goes well, you should have a sturdy and light set of legs to use as a base for any table top you can dream of.  The method of attaching the top to the base is discussed in the next section.

The Top

The latest addition was a lighter table top.  Previously, we used a piece of 3/4" Oak Plywood with vinyl stapled to it.  This was extremely sturdy and stable, but it was a huge pain to move.  I designed the new top to be light and attach directly to the legs.

Much like the legs, the top was stick framed using flashing from Lowe's.  This time, 1x2's provided a good base, and Kreg Pocket Hole joinery held everything together.  Along the center line, two lengths are abuttewd to provide enough surface area for the hinges.  Instead of heavy plywood, I used a thin luan top.  All this was wrapped in vinyl again (the most successful table covering we've had thus far).  Unlike previous folding incarnations, the vinyl was split in two pieces and each half of the hinged top was wrapped separately.  The cut list for my 6' 6" top is below.  The Inside Stiles are not required to be the listed lengths as long as their total lengths come under 72".  I placed them so they would fit between the blocks in the legs and help the top align to the legs.  Your mileage may vary; see lessons learned below.  As always, your local dimensional lumber may vary, measure twice, cut once, and always wear your safety glasses:

  • Outside Stile: 78" x 4
  • Rail: 19" x 8
  • Inside Stile (Ends): 17 7/16 x 8
  • Inside Stile (Center): 37 1/8" x 2

Assembly is a little trickier than the Legs.  With your pocket hole jig, join the Outside Stile to the Rails at both ends.  Use the Inside Stiles to locate where to place the inside Rail.  Add the Inside Stiles to make a double-layer of wood in the center of the table-top to better brace the hinges.


With two halves of a table top in hand, it is time to locate the hinges.  Match the hinge location to your legs so they won't interfere with how the table sits flush.  The vinyl wrapped on the side that will be the center of the table will need to be relieved where the hinges will go.  I chose to wrap after attaching the hinges.  I now feel this was a mistake. In the pic above, I've routed out a place for my hinges.  In practice, I didn't need to do this.  Just clamp the table halves together after the vinyl is in place, locate your hinges parallel and centered on the joint and screw in place.

I have tried many things to secure the table top with a minimum of fuss.  Right now, I'm using machine screws and associated sockets sunk into the top.  The screws thread through the legs and into the top.  They require climbing under the table.

Lessons Learned

  1. I would decide on a method of attaching the table before I started building.  The primary candidate is a Sash Lock.  Placed correctly, it would easily lock the legs to the table top without climbing under each time.
  2. I would avoid insetting the hinges.  Instead, careful placement would allow the hinges to be used without interfering with the mating of table top and legs.
  3. I would wrap the vinyl completely around the top so all stapling was done on the bottom.
  4. I would not tell my gaming group how much better this version of the table was until after it had proven itself.  I have gotten no end of grief every time I climb under it to hook the two together.  What are friends for, eh?

Bonus Shot: Plans


Tuesday, July 22, 2014

Updated: Random Shop Projects

Cat Tower

We needed a new cat tower due to acquiring a monster of a tom.  Might as well do it right!.  I wrapped the columns in sisal (one roll of Lowe's Blue Hawk lasted about a foot and a half), made the base double-thick plywood, and wrapped all horizontal surfaces in carpet.  There are a brazillion staples in that thing.


I wish I had purchased round posts instead of these ungainly square ones.  Not only were they more difficult to wrap, but the sisal seems to pull away and tear easier when it sits a quarter inch from the surface in the middle of each face.  The next model will have pillars, and I have half a mind to glue the sisal in place to lengthen the time it takes to get into such disrepair.

Update: I made a small tower for upstairs and glued the sisal in place.  It seems to be holding up much better over time.  Instead of using square pylons, I used redwood ties from Lawn and Garden.  They wrapped much nicer than the square ones.  It is held by a single bolt and, as of this writing, has broken once when someone fell on it.  Eep!


Vacuum Tool Holder

This serviceable Shop Vac tool holder plan came in via Shop Notes.  The tools are sitting atop PVC end caps of a fitting size.  It took longer to find the parts than it did to assemble the thing.


Miter Sled

Shop Notes, Woodworking for Mere Mortals and a bunch of Indian Rosewood acted as a catalyst to get me to build a Miter Sled.  I hate miters on a contractor's chop saw.  The constant adjustment leads to endless headaches.  The sled eliminates this with a stable 90 degree platform that facilitates perfect cuts every time.


The base is plywood, and I followed the techniques of the above YouTube video to get my rails aligned.  To each arm, I added T-Track and will build stop blocks.  These will be invaluable for building boxes and lots of picture frames in the same size. 

Now all I need is a spline jig that stands the miter on end and allows reinforcing slots to be added...

Bonus Shots

Miter Sled Plans

Garage Shelves Plans

Bitz Wall for Blue Table Painting 

Page 2